For a lot of pitchers, the first few minutes of catch play are treated as exactly that, the first few minutes. Grab a ball, find a partner, make a few throws to get the arm loose and start backing up until the “real” throwing begins.
I think we’re missing a huge development opportunity when we approach catch play that way.
As a high school coach, I want pitchers and position players to use their first 20 throws to establish the movement patterns they’re going to rely on for the rest of their throwing progression. Before we add distance, increase intensity or get on the mound, we have an opportunity to slow everything down and be intentional about how our body is moving.
And because these are some of the easiest throws we’re going to make all day, our standard for execution should be extremely high.
For me, there are three concepts I want a pitcher to establish:
Arm flow. Stable load. Timing at front foot strike.
Each builds into the next. And by the time we get through those first 20 throws, we should have created a strong foundation to start letting the athlete take over.
1. Establish the Arm Flow
The first thing I want to establish has nothing to do with the lower half.
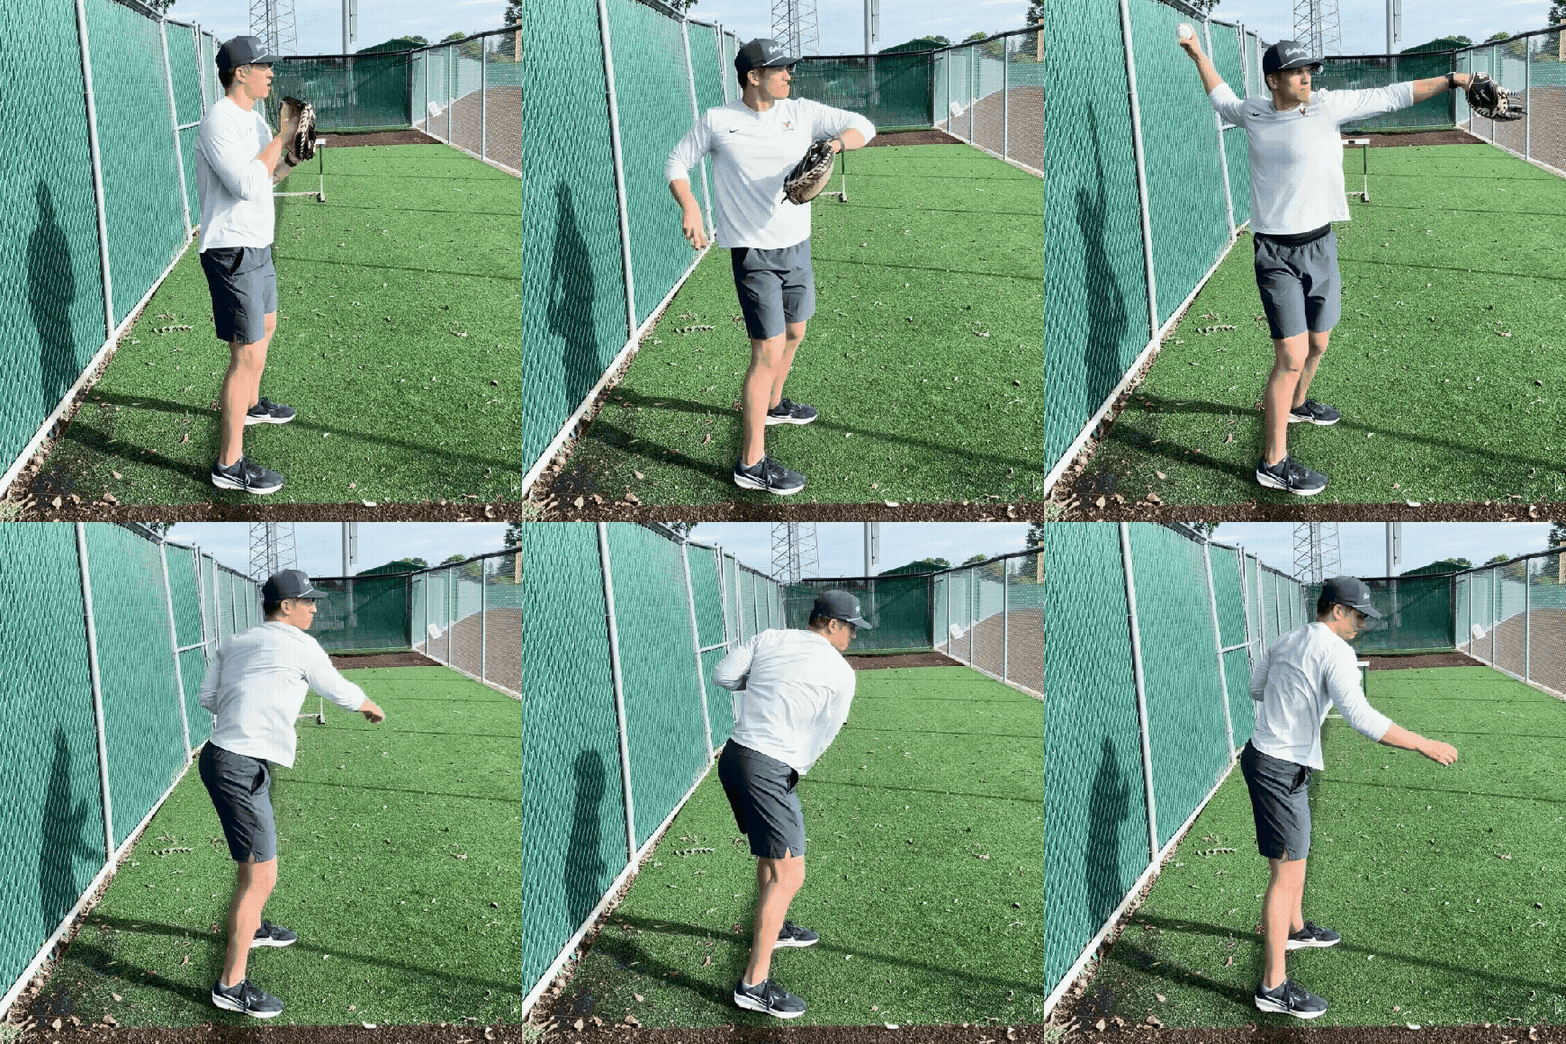
For the first five to ten throws, we’ll take the legs almost completely out of the movement. The goal is to let the arm work through a full range of motion while maintaining good direction toward our target.
I want the arm relaxed. I want it flowing freely. And I want the pitcher to feel what it’s like to consistently get into a good throwing position without having to rush to get there.
One of the biggest things I emphasize here is giving the arm time to work.
We’re close to our partner. The intensity is low. There is absolutely no reason to rush through the movement.
Feel the arm work through its entire path. Allow it to get all the way up into a strong throwing position. Keep the shoulders directed toward the target and then accelerate through the throw.
We’re establishing a feel that we’re going to carry with us as the throwing progression gets more athletic and more intense. That’s why I don’t want pitchers mindlessly flipping the baseball back and forth just because they’re 30 feet away.
If anything, the simplicity of the task means we can demand more attention to detail.
2. Add a Stable Load
Once we’ve established how we want the arm to work, we can start blending it with the lower half.
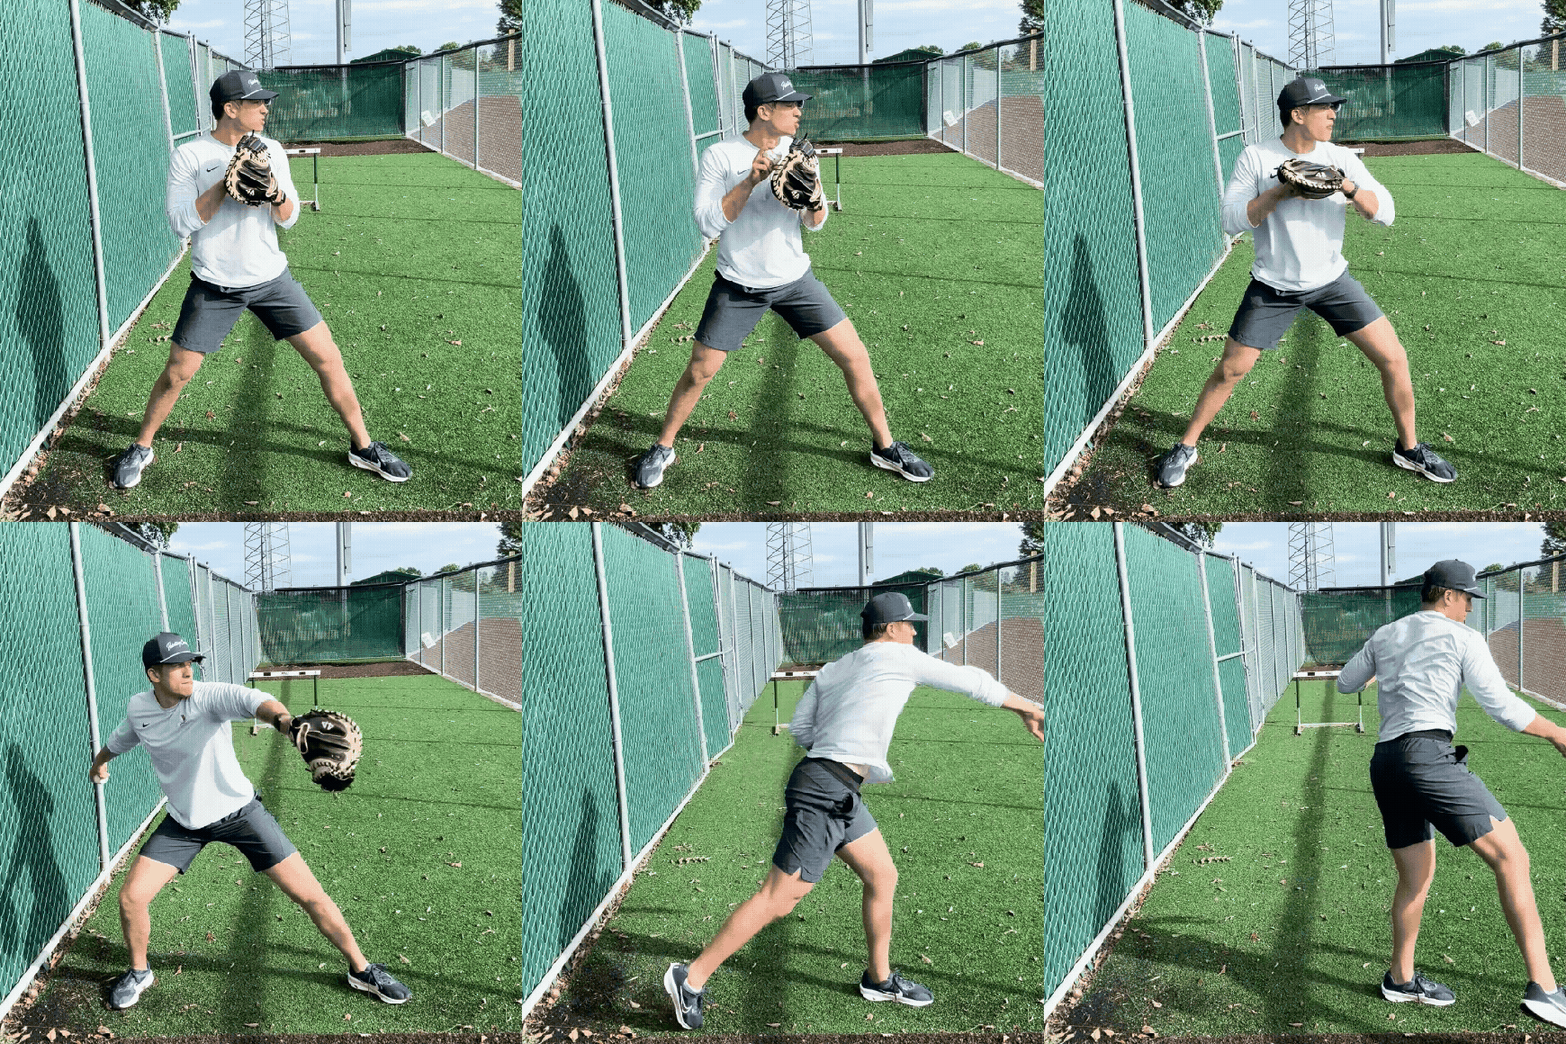
Now I want the pitcher to feel full foot contact with the ground and create a stable load into the back hip and back leg. We want good posture, our shoulders working toward the target and our body in a position where we can move efficiently into the throw.
The important part is that the lower half shouldn’t suddenly make the arm rush. We still want the same relaxed arm action we established during those first few throws.
Load underneath the arm. Don’t rush the arm to keep up with the load.
This is where the pieces start syncing together. The ground gives us something to work against. We load into the back side. The arm continues through its path. And instead of thinking about the upper and lower half as two separate movements, we’re beginning to organize them into one throw.
Again, we’re still close. We don’t need to create a ton of intensity yet. The goal is to establish a position we can consistently move from before we ask the body to move faster.
3. Own the Timing at Front Foot Strike
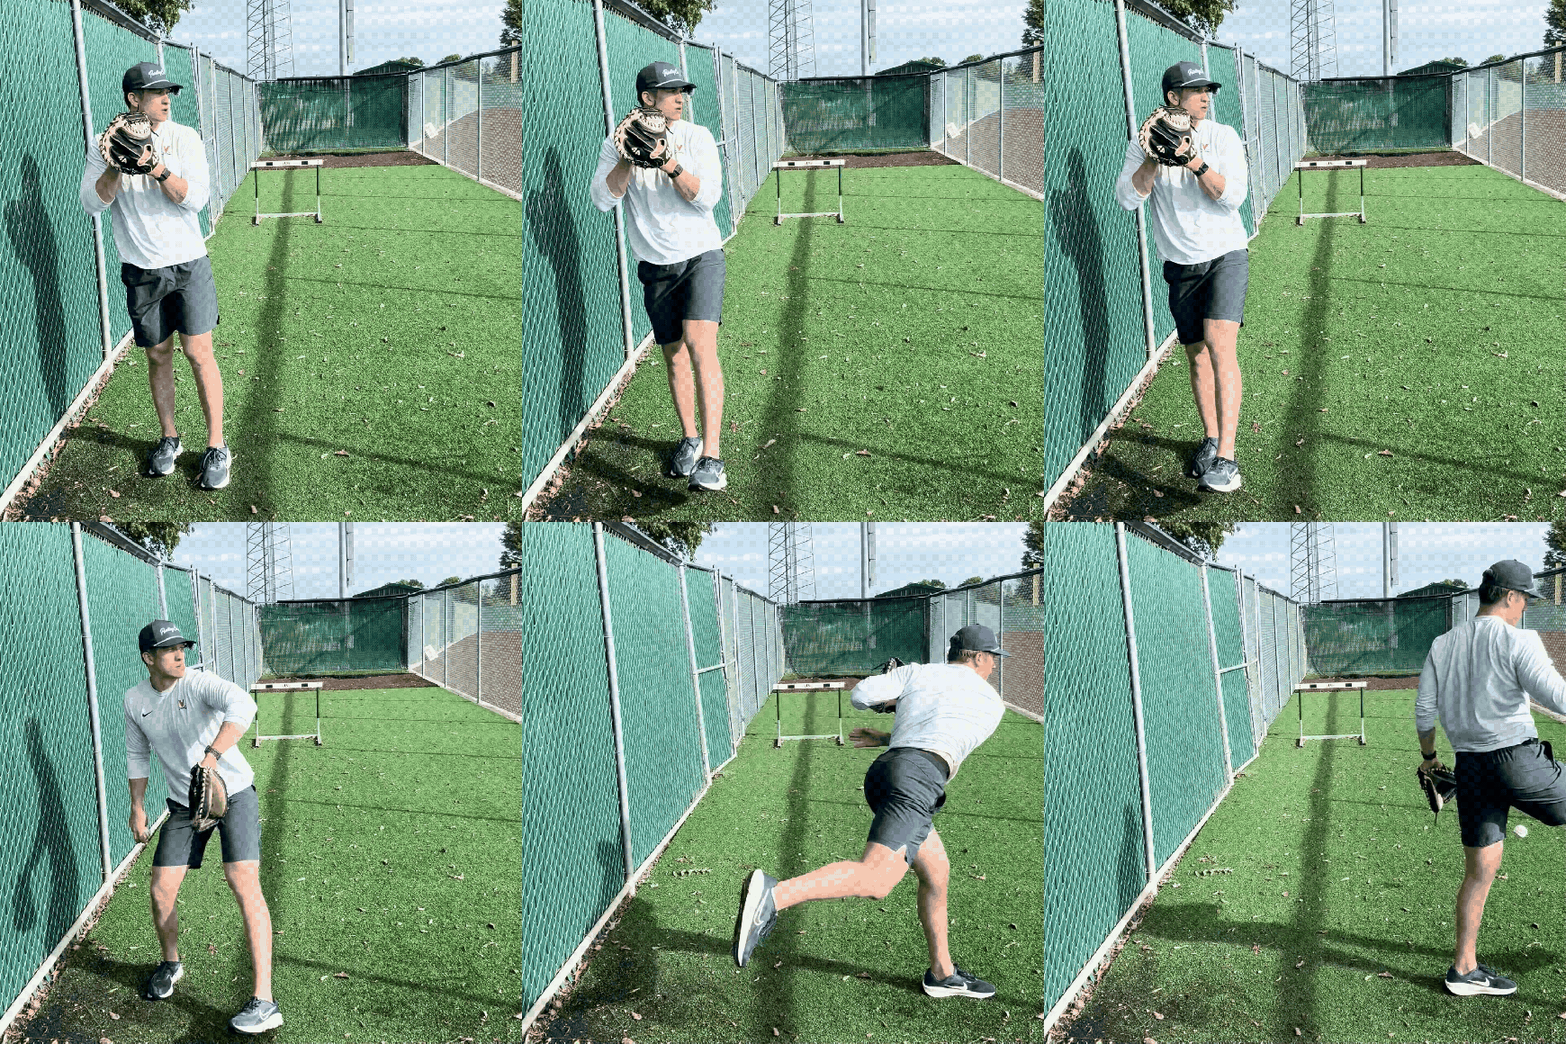
Now we can start making the throw more athletic. Introduce a step. Start moving through the baseball. Let the lower half create more momentum.
But as we introduce more movement, I want the player to understand what needs to happen when that front foot hits the ground. At front foot strike, we need to be ready to throw.
The arm is up. We’re loaded. We’re balanced. Our body is organized in a position where we can accelerate through our target.
This is where the work from those first two concepts comes together. We established the arm path. Then we added the load. Now we’re learning how to time the two together. And balance is extremely important here.
At this point, we should still be at or under 60 feet. There isn’t enough distance or intensity to justify falling all over the place just to create more velocity.
Control your body.
Get to front foot strike in a good position.
Then accelerate through the target.
As we eventually start moving farther away, incorporating shuffle throws and building toward long toss, the movement will naturally become more dynamic. But the positions and timing we’ve established shouldn’t disappear just because we’re throwing harder.
Earn the Right to Add Intensity
This is ultimately why I care so much about the first 20 throws.
There’s going to be plenty of time to throw hard.
We’ll stretch the distance out. We’ll add shuffle throws. We’ll get into long toss. Depending on the day and the athlete, we might eventually move into high-intent throws, pulldowns or mound work. But before we ask a pitcher to move fast, let’s give him an opportunity to establish how we want him to move.
That’s the progression:
Arm flow → Stable load → Timing at front foot strike → Distance and intensity.
We’re gradually removing constraints and asking the athlete to do more. And the further we progress, the less I want the pitcher consciously thinking about every little piece of his mechanics.
Those first 20 throws are where we have the time and simplicity to be intentional. Once the intensity increases, trust what you’ve established and let yourself throw.

